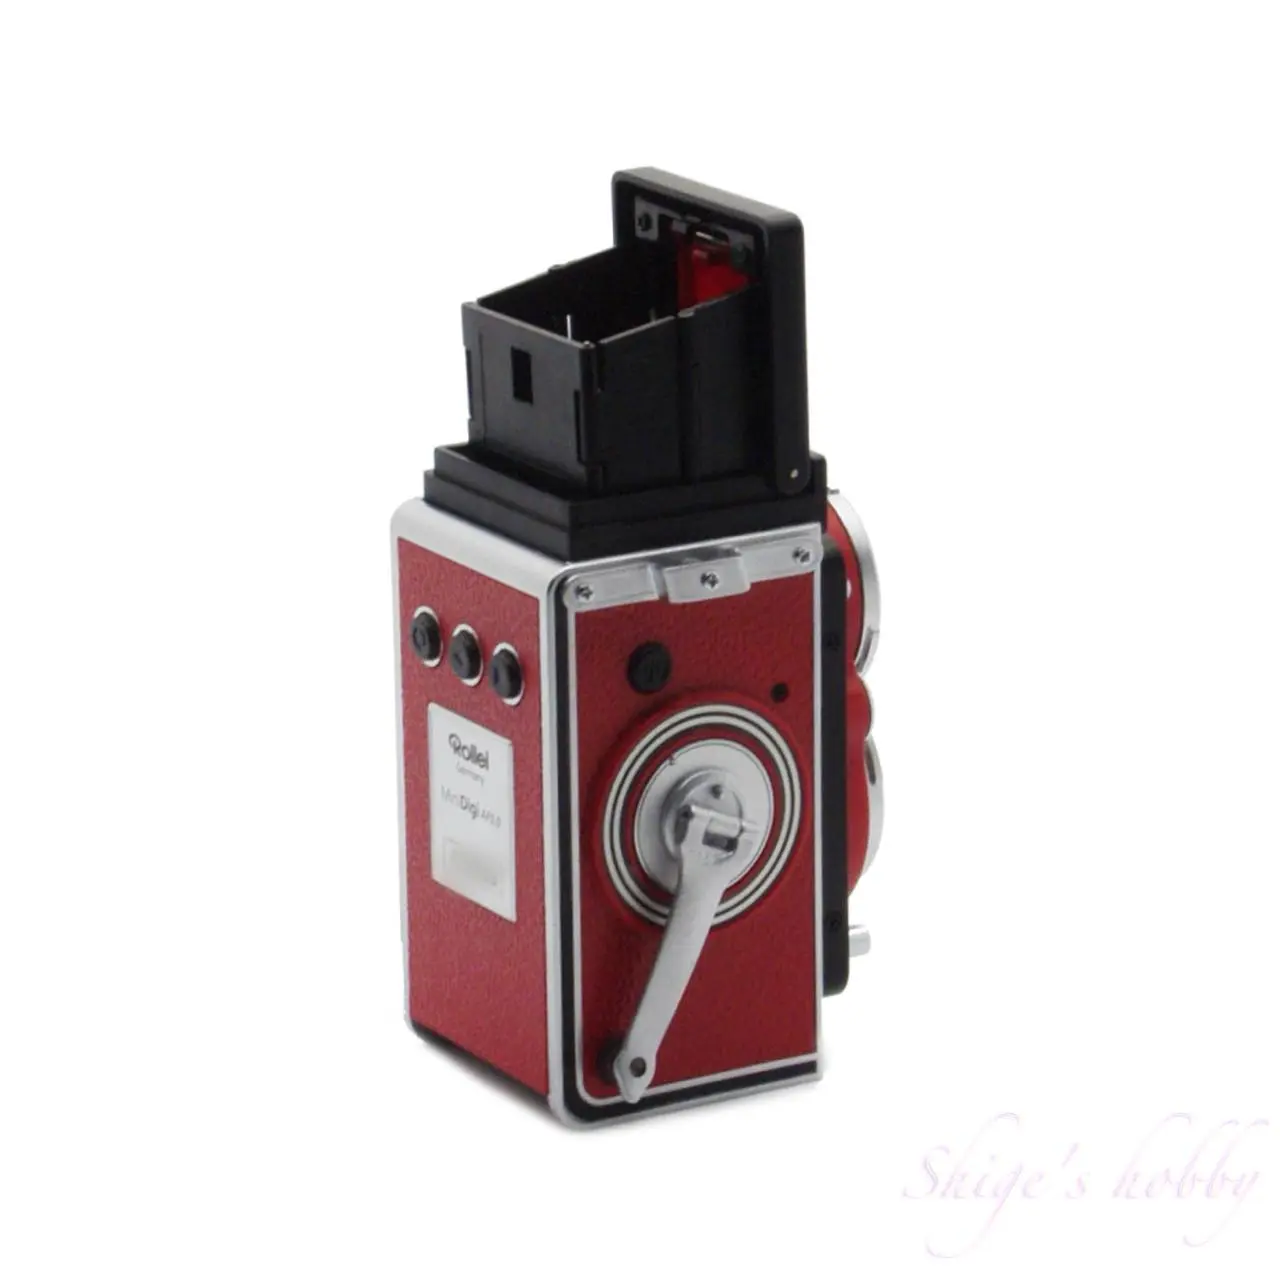
Stylish ornament Rolleiflex MiniDigi AF5.0

Rolleiflex MiniDigi AF5.0 review and photo examples
- Please see the disclaimer regarding advertising here.
- Italicized links in the text are advertisement links that take you to other sites.
Table of contents

Gallery
Review

1.Overview
The Rolleiflex MiniDigi AF5.0 is a miniature digital camera released by Komamura Shokai on February 25, 2006.
The camera’s specifications are as follows. New models come with a genuine leather strap, a 256MB miniSD card, and one CR2 battery.
- 3-megapixel image sensor
- The lens has an effective focal length of 4.9mm, an f/2.8 aperture, and a three-element configuration.
- There are three image recording modes: H, N, and S. H is 5-megapixel mode with pixel interpolation (2304×2304 pixels), N is standard 3-megapixel mode (1536×1536 pixels), and S is reduced size (768×768 pixels).
- Minimum focusing distance is 10cm.
- Shutter speeds are 1/15-1/2500 second, with auto settings only.
- Exposure and white balance are auto only.
- Recording media is miniSD card.
- The camera does not have a date retention function.
- Powered by a single CR2 lithium-ion battery, with approximately 2 hours of continuous shooting time.
- Dimensions are 49x45x73mm (WxDxH), and weight including battery is 100g.
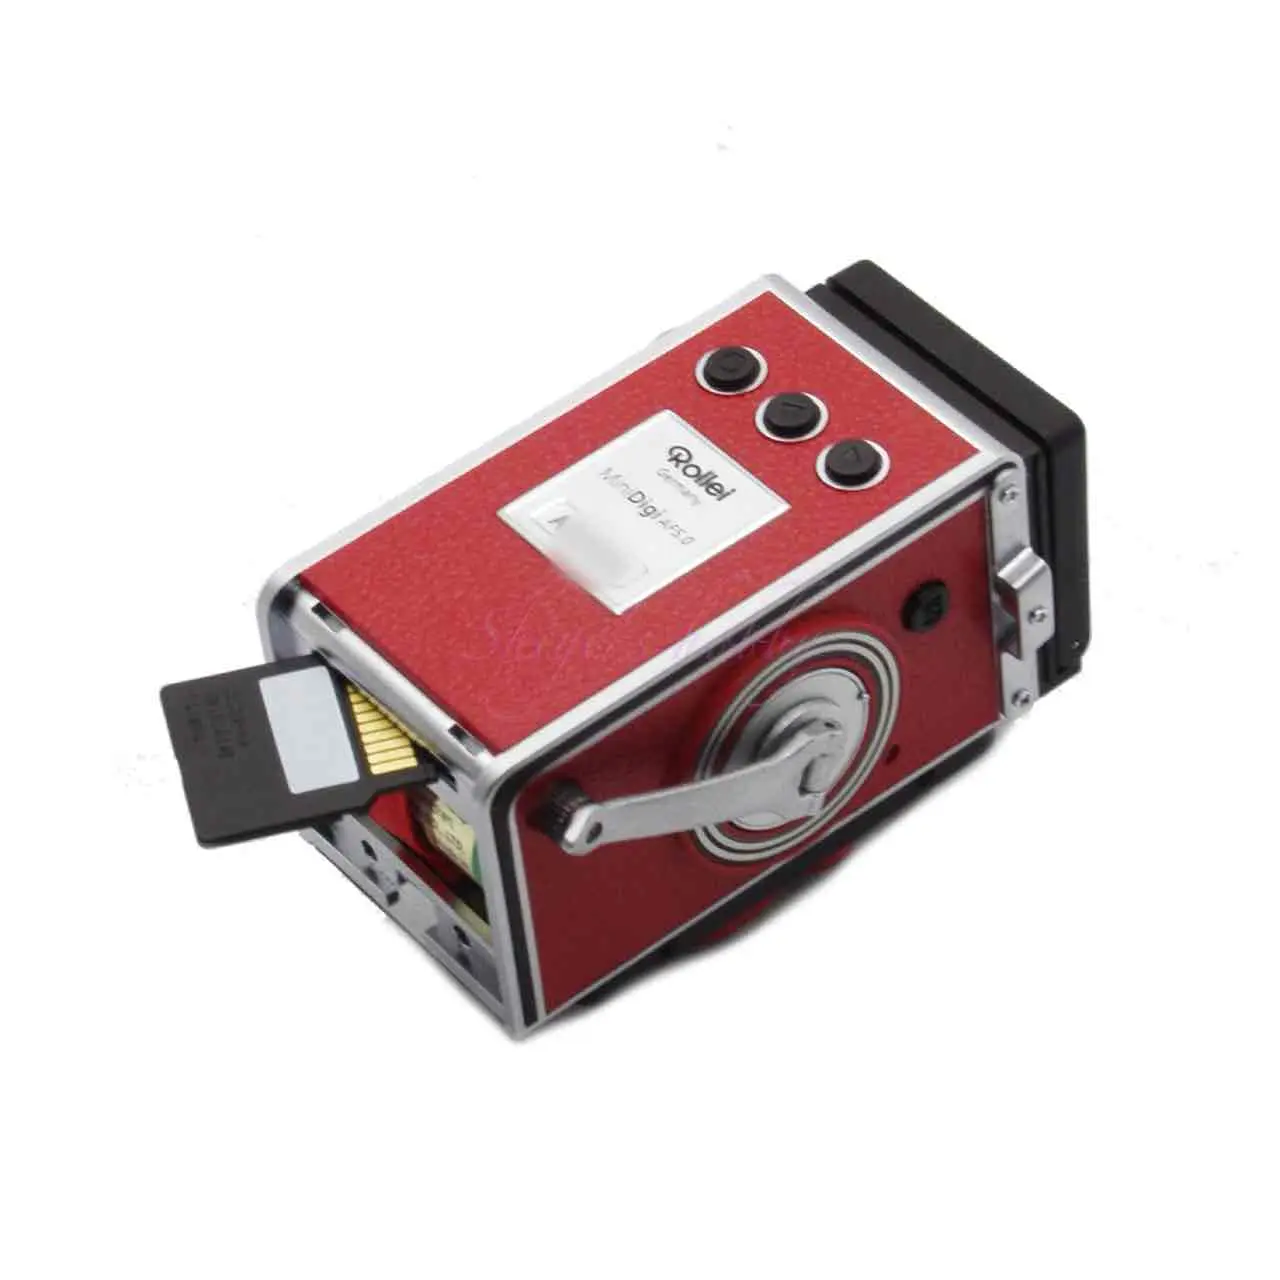
Insert the miniSD card in the orientation shown in the photo below. The CR2 battery compartment is located below the miniSD card slot.

2.Usability
The Rolleiflex MiniDigi AF5.0 is a miniature digital camera, a toy camera, so you can’t expect much in terms of image quality. Still, the photos it takes are reminiscent of an Instax, and some people may prefer them.
I bought this camera because I was attracted by its appearance, but it proved quite tricky to use. Here are the results of my trial and error to get the photos I wanted.
In conclusion, this camera is a stylish ornament.
First of all, this camera is fully automatic. The only setting you can adjust is the recording resolution. It can record in three image sizes: N mode, which records at the default resolution of 3 megapixels; H mode, which expands the resolution to 5 megapixels; and S mode, which reduces the resolution to 600,000 pixels.
The image sensor’s latitude, or the range of brightness it can reproduce, is very narrow, so blown-out highlights and crushed shadows are common. Furthermore, image quality adjustment functions to reflect the photographer’s intentions, such as exposure compensation, white balance, and shutter speed, cannot be adjusted on the camera itself; only auto settings are available, so it is not possible to intentionally underexpose the subject to make it stand out using the camera’s settings.
For this reason, photographers need to understand the quirks of the camera’s auto behavior and get the camera to operate in a way that suits their intentions. With a camera that is designed for all operations to be automatic, I tried the following three methods to see if I could lock the focus, exposure, and white balance at the desired positions and then change the composition and take the photo.
・Focus
First of all, the autofocus operation is quite slow, and even looking at the LCD screen it’s difficult to tell where the focus is. To operate it, press the shutter button and “FOCUSING” will be displayed, and this operation seems to perform the focus operation.
After taking several photos with autofocus and looking at the results, it seems that the best focus is about 3m away. However, at infinity, such as the sky, the photos are not clearly focused, to the point that I wonder if the focus is off. I had no choice but to accept that this is only due to the sensor’s resolution.
Since there is basically little the photographer can do, I concluded that it is safest to focus at a distance of about 3m.
・White Balance
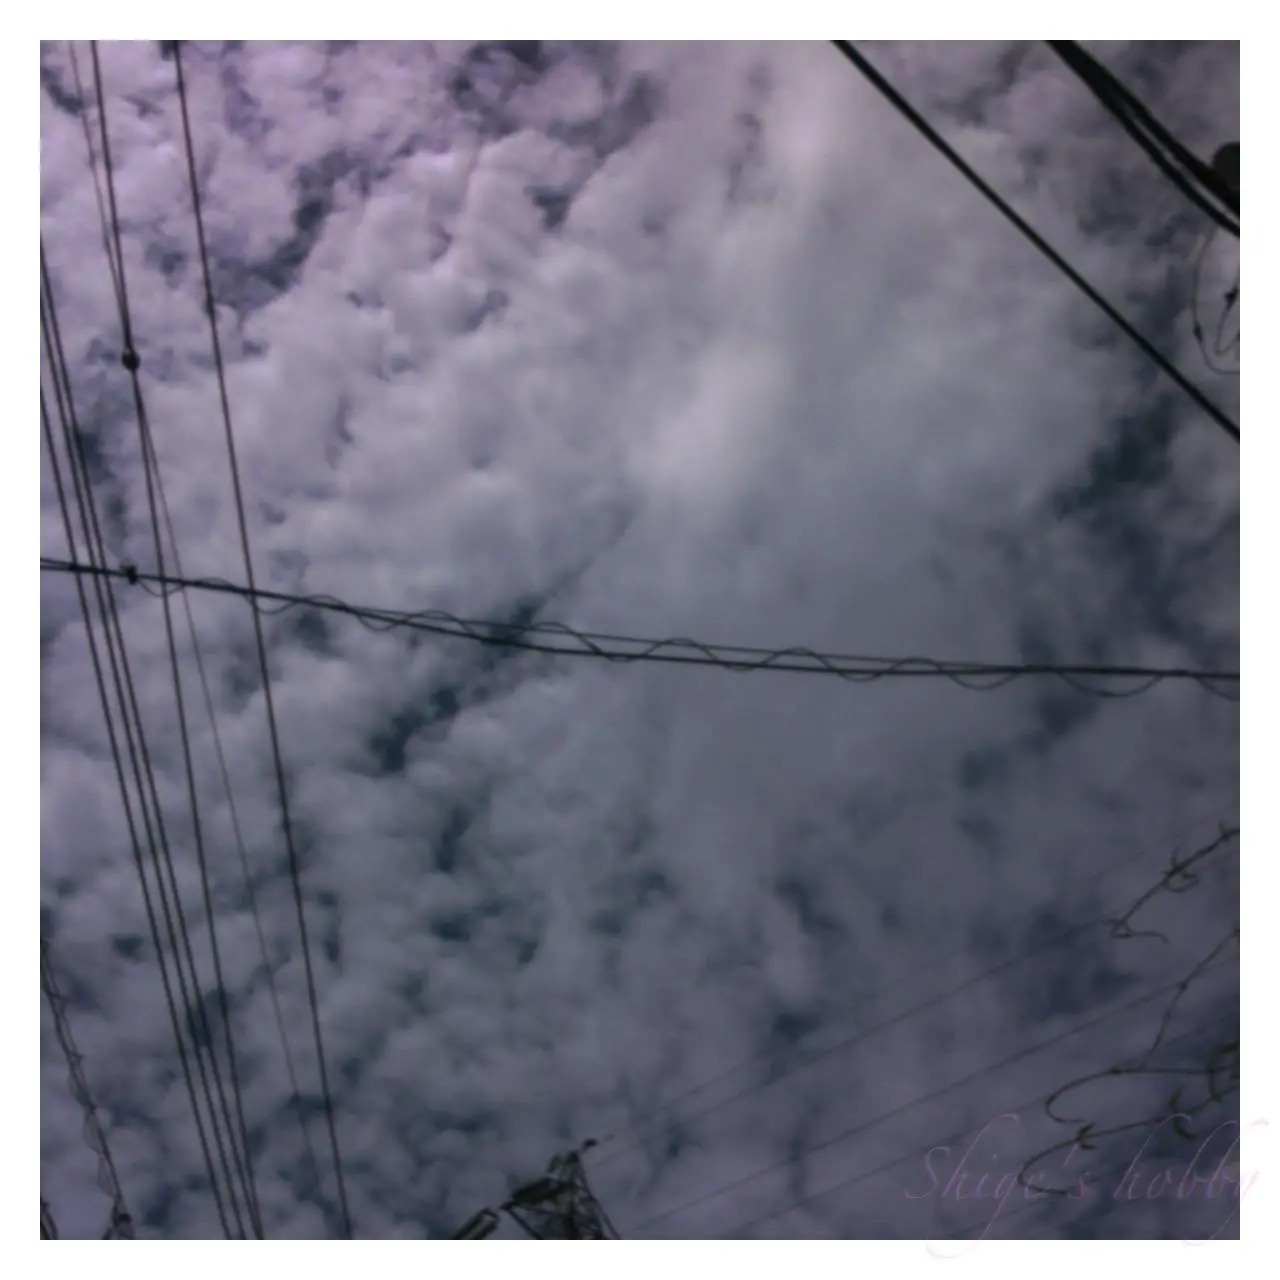
Next, white balance. When photographing the sky, in most situations auto white balance will produce disappointing results, with the color shifting to cyan. This can be fixed with image processing software, so photographers who can use it don’t need to worry about it. However, for photographers who depend on the original image output by the camera, it will be unbearable.
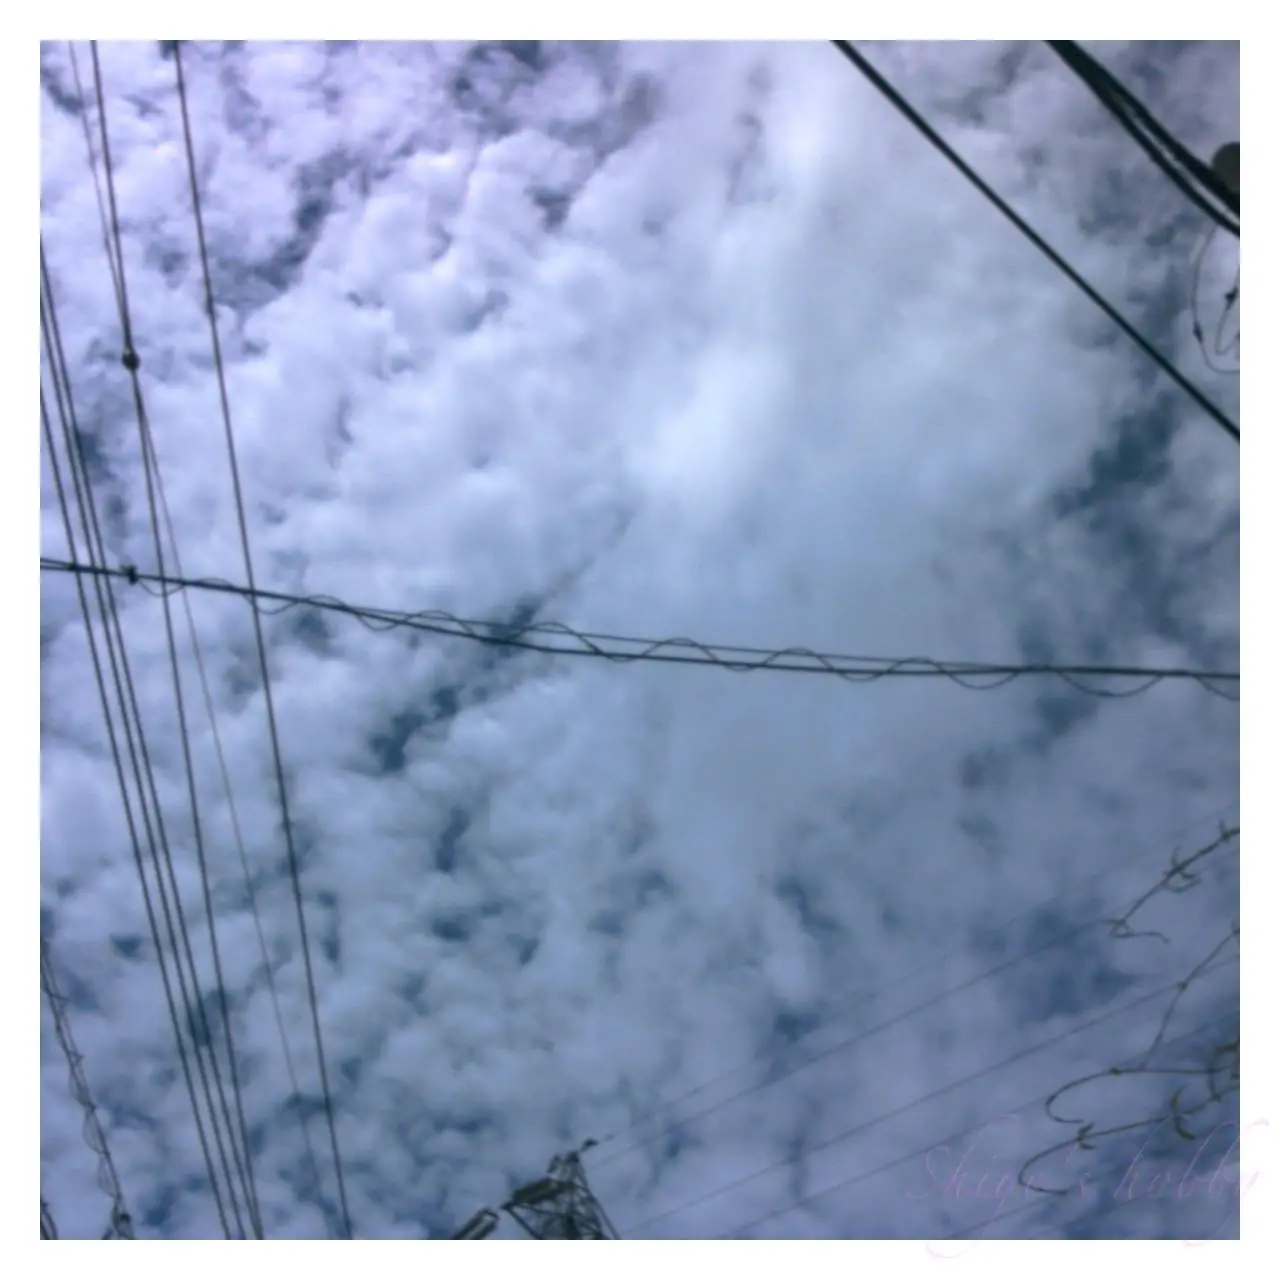
Below are some samples that aren’t very good, but I managed to fix the photo below.
- The image on the left has a cyan cast due to auto white balance.
- The image on the right is the result after adjusting white balance, contrast, exposure, and brightness.
I would emphasize that the reason the adjustment results are poor is because the image’s potential is low, so the adjustment range is narrow.
When the colors are strange and there’s nothing you can do about it, you can capture the tonal gradation of the image to a certain extent, so converting it to black and white will make the image look a little better.
・Exposure
Finally, there’s exposure. In a normal camera, exposure is adjusted using the aperture and shutter speed, but this camera doesn’t seem to have any mechanical apertures in front of or behind its three-element lens in one group; it probably has no concept of aperture, and there’s no sound like a mechanical shutter is operating, so it appears to be using a sensor shutter.
Therefore, in order to get this camera to reflect the photographer’s intentions, the key seems to be how to get the camera to adjust the sensor’s shutter speed = exposure time.
Inference 1: If the shutter speed is determined and fixed when you press the shutter button and focus, then you should be able to get the shot you intended by selecting a subject with a brightness that is likely to result in a shutter speed you like, fixing the shutter speed, and then adjusting the composition.
Inference 2: If the shutter speed is determined and fixed when you press and release the shutter button to take the picture, then Inference 1 is useless, and we arrive at the sad conclusion that there is no way to get the photographer’s intentions to be reflected in the camera.
Now, here are the results of my experiment.
Perhaps hypothesis 1 was correct. When focusing, I aimed at a green object, one of the three primary colors, at about 3m away, then adjusted the composition and took the photo, and the exposure, focus position, and white balance were all OK, resulting in a good image.
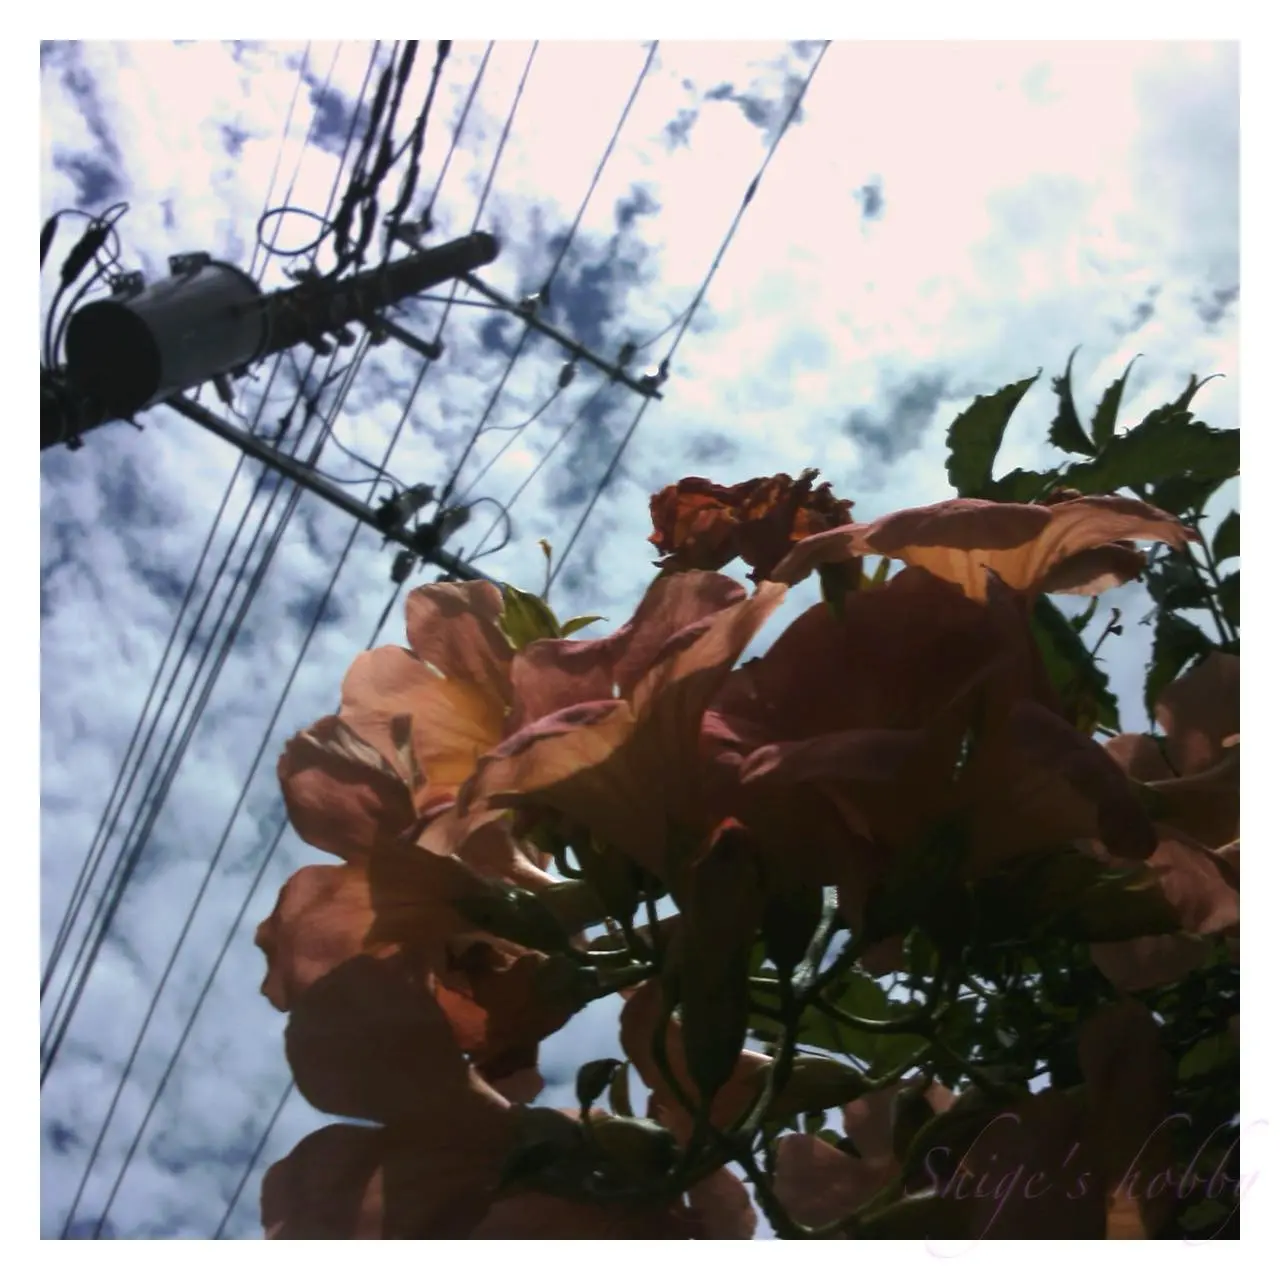
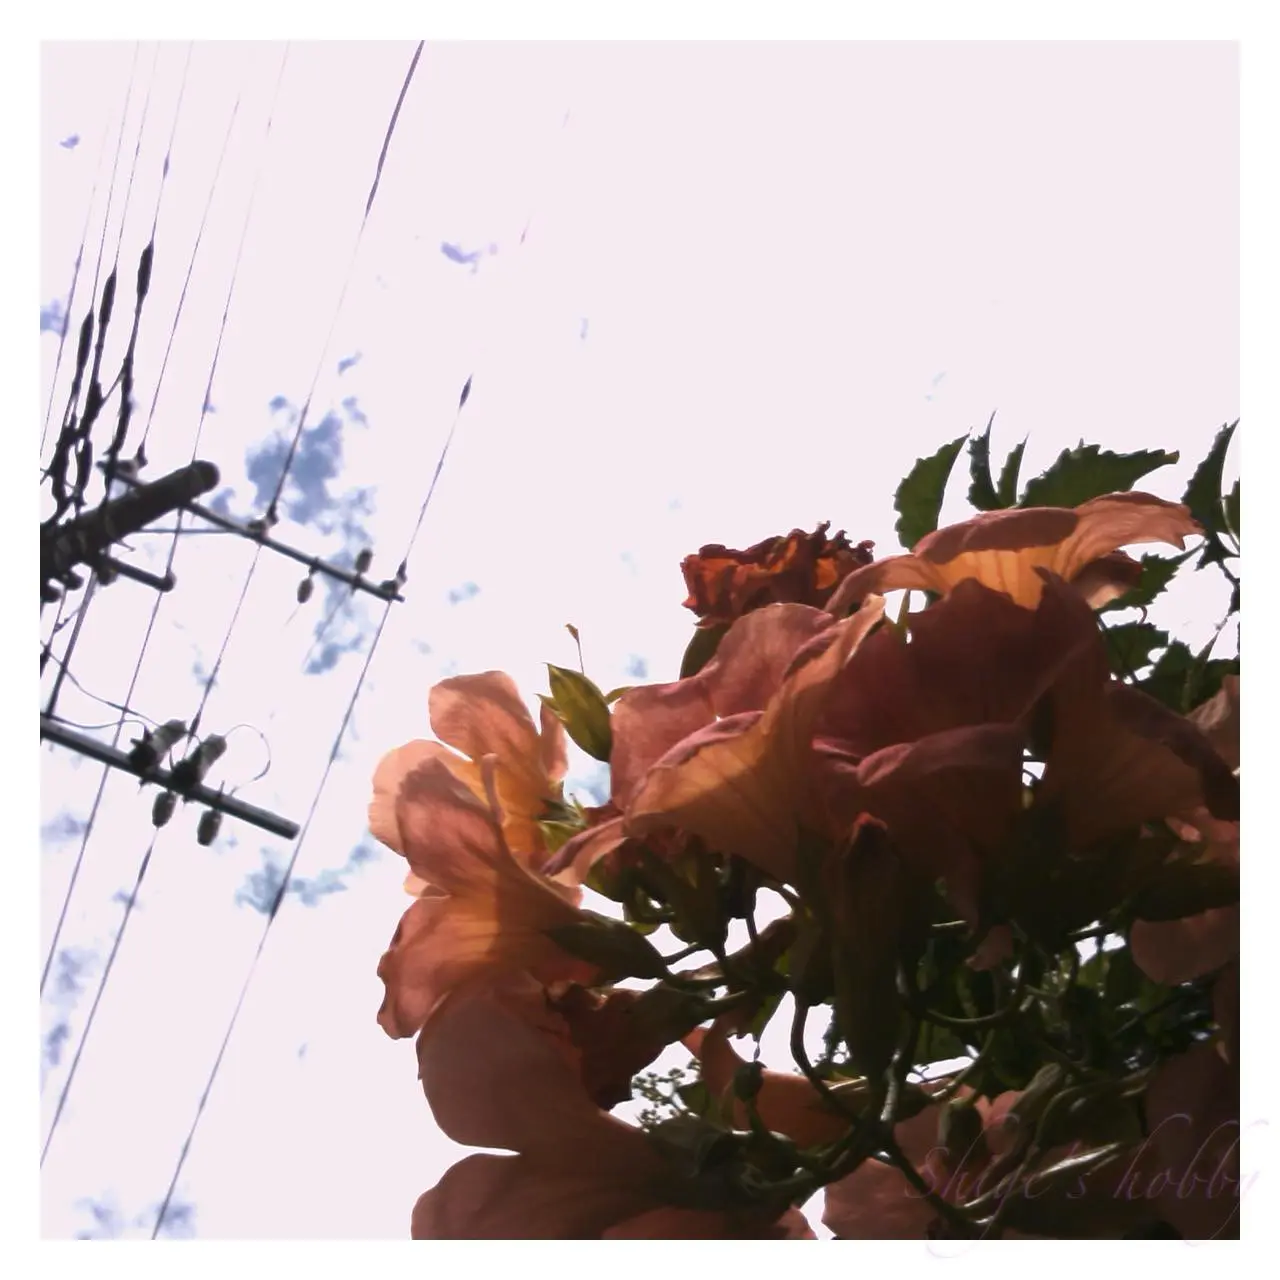
In the photo below, the left is the result of focusing on the trumpet vine and then taking the photo as is, with the trumpet vine appearing dark due to being overshadowed by the brightness of the sky. On the right, I focused on the dark green plants below the trumpet vine, then brought the composition back to the trumpet vine and took the photo. The dark green slowed down the shutter speed, brightening the color of the trumpet vine and washing out the sky, which was pretty much what I was aiming for.
The shooting method is also quite unique. The manual describes the shooting method as follows, and does not seem to take into account the method of adjusting the composition after focusing, as in this case:
“Decide the composition, press the shutter button all the way down, then immediately release it. The camera will automatically focus, take the picture, and save the image in succession. During this process, the display will change as follows: FOCUSING → CAPUTURING → SAVING.”
In this case, I adjusted the brightness to my desired level and went through the following steps: FOCUSING → Adjust composition → CAPUTURING → SAVING.
However, if you take too long to change the composition, the camera will automatically adjust to the new brightness and white balance, so you need to change the composition quickly. This is a way to take advantage of the camera’s slow operational response.
When shooting, you need to turn the lever on the side of the camera to charge the shutter. I think this is a gimmick to create a certain atmosphere, but honestly, it doesn’t really have much meaning. In fact, I often forget to wind the film and can’t take a picture, realizing I need to turn it. Since it can be turned even when the power is off, I think it’s a physical switch rather than a shutter charger.
The LCD monitor’s display quality is poor, barely visible in bright light. And while it’s barely visible in dark places, the preview image is often quite rough and overexposed. The actual results may vary on a PC, so the camera’s LCD display is unreliable. The fun part is to just take a photo and see the results.
Perhaps inheriting the spirit of the Rollei twin-lens reflex camera, the camera records square images. The sensor size isn’t specified in the manual, so the image sensor details are unknown, but it’s unlikely to be a costly dedicated sensor; rather, it’s assumed to be a cropped 3:2 sensor.
When the power is turned off, the image quality setting reverts to N. H is a supplementary image, and L is 600,000 pixels, which is sufficient for N, so I wouldn’t say I’m dissatisfied, but I’m not sure how it works as a digital camera.
When you flip up the camera’s display cover, a small window opens up on the flip-up plate as a shooting guide. The manual recommends using the display as this window is offset from the actual shooting position. However, since the display is also largely unreliable, it might be better to just accept it and use this window as a guide.
Also, this camera does not allow you to set the date. When you take a photo, the date December 31, 2047 will be entered in the image’s Exif file.
The camera uses a CR2 lithium battery. The manual states that the battery will wear out if left in, and since the camera doesn’t have a date or clock function, it’s best to remove it when you’re done using it.
The recording medium is a mini-SD card, and I was able to use the camera somehow thanks to some 16MB and 64MB cards in my old memory card collection. As of 2025, several vendors on Amazon are selling used mini-SD cards, as well as a microSD to mini-SD card adapter. I obtained and used one, and the camera recognized the adapter and a 2GB microSD card. The number of shots taken in the default N mode is as follows:
- N = 23 for a 16MB card
- N = 92 for a 64MB card
- N = 3316 for a 2GB card
Additionally, two options are available on AMAZON: the “Rollei MiniDigi AF5.0 Conversion Lens 0.45X Wide/Macro Magnetic Mount” and the “MiniDigi AF5.0 0.38x Super Wide Lens.” The list price was several thousand yen, but since it’s a discontinued product, the seller on AMAZON is pricing it quite aggressively, so I’m not really interested in buying it. I think these options would be worth picking up for around 2,000 yen at most.
3.Summary
In conclusion, to sum up the Rolleiflex MiniDigi AF5.0 is a casual toy digital camera that also makes a lovely decorative piece.
Don’t expect great resolution or image quality, but once you get used to it, you’ll learn how to adjust the exposure to your liking and be able to take photos you like. Using this camera reminds you that exposure is everything in photography.
Specifications, considerations, etc.
This camera is a toy digital camera designed and manufactured in China by Komamura Shokai, whose camera business has now been transferred to KENKO TOKINA. It’s branded as Rollei, but there’s absolutely no Rollei essence inside it beyond the exterior.
Even including the Rollei branding, the list price of 40,000 yen for this digital camera seems quite aggressive.
Of course, I bought it second-hand, so I didn’t pay that much.
As of 2025, an evolved version of this camera is still on sale as the CHUZHAO Vintage Mini Digital Camera.
Its evolutionary features include an upgraded 12-megapixel sensor, micro-SD card storage, and a lithium-ion rechargeable battery, fulfilling the standard specifications of a modern digital camera. With discounts included, it can be purchased on Amazon for around 5,000 yen, so if you think of it as just a fun item, it might not be so bad.
Reference links
- Komamura Shokai releases the upgraded miniature digital camera “Rolleiflex MiniDigi AF5.0”
- Komamura Trading Company(The camera business was transferred to KENKO TOKINA (Kenko Professional Image).)
- Rolleiflex MiniDigi AF5.0 Manual
- Rolleiflex MiniDigi AF5.0 Conversion Lens Manual
Affiliate links

Amazon Prime Sale
- Rollei MiniDigi AF5.0 Conversion Lens 0.45x Wide/Macro Magnetic Mount
- MiniDigi AF5.0 0.38x Super Wide Lens
- CHUZHAO Vintage Mini Digital Camera
Update history
- 2025.8.18
Leave a Reply